Back to how-to articles
Getting started using Map Components
Last updated: July 3, 2025
In this article we are going to show how to get started with using map components to create map apps for the browser. We are going to build a small map application with MapLibre. MapLibre is an open-source fork of Mapbox, and is well suited for map-centric applications due to its large community and compability with Mapbox.
We are going to build the application using React and Next.js.
Prerequisites
First we need to install Node Package Manager, also known as npm. You can install npm by going following the instructions here: https://docs.npmjs.com/downloading-and-installing-node-js-and-npm
Creating the app
To get started we can create a new React app:
1npx create-next-app@latestIf asked to install packages, do so.
The command will ask you about details of your app. For this tutorial we chose the following parameters:
1✔ What is your project named? … map-example
2✔ Would you like to use TypeScript? … Yes
3✔ Would you like to use ESLint? … Yes
4✔ Would you like to use Tailwind CSS? … Yes
5✔ Would you like your code inside a `src/` directory? … Yes
6✔ Would you like to use App Router? (recommended) … Yes
7✔ Would you like to use Turbopack for `next dev`? … Yes
8✔ Would you like to customize the import alias (`@/*` by default)? … No
This creates a project. We can then navigate into it:
1cd map-exampleAdding the map component
Since we are using React, we are going to use the visgl react-map-gl package.
First, we install the package by running the following in the terminal:
1npm install react-map-gl maplibre-glThen we can edit src/app/page.tsx. Replace with the following:
1"use client";
2import * as React from "react";
3import { Map } from "react-map-gl/maplibre";
4import "maplibre-gl/dist/maplibre-gl.css";
5
6export default function Page() {
7  return (
8    <Map
9      initialViewState={{
10        longitude: -47.88,
11        latitude: -15.79,
12        zoom: 100,
13      }}
14      style={{ height: "100vh" }}
15      mapStyle="https://tiles.openfreemap.org/styles/liberty"
16    />
17  );
18}
19
Note here that we use openfreemap for mapStyle. The mapStyle defines what kind of colours and what the "tiles" should look like. A map like this consists of many pictures joined together, and each of these pictures is a tile.
Now run the following command to start the dev server:
1npm run devNavigate to http://localhost:3000 and you will now see your new Map application!
You can find lots of examples of what you can do with the map here: https://visgl.github.io/react-map-gl/examples
Be sure to use the MapLibre examples.
Showing markers on the map
Firstly we need to get a pin to show. We are going to install an open source icon package called lucide-react. Add it to the project by running:
1npm install lucide-reactThen we can display an icon on the map by editing src/app/page.tsx with the following:
1"use client";
2import * as React from "react";
3import Map, { Marker } from "react-map-gl/maplibre";
4import "maplibre-gl/dist/maplibre-gl.css";
5import { MapPin } from "lucide-react";
6
7export default function Page() {
8 return (
9 <Map
10 initialViewState={{
11 longitude: -47.88,
12 latitude: -15.79,
13 zoom: 10,
14 }}
15 style={{ height: "100vh" }}
16 mapStyle="https://tiles.openfreemap.org/styles/liberty"
17 >
18 <Marker longitude={-47.88} latitude={-15.79} anchor="bottom">
19 <MapPin color="red" />
20 </Marker>
21 </Map>
22 );
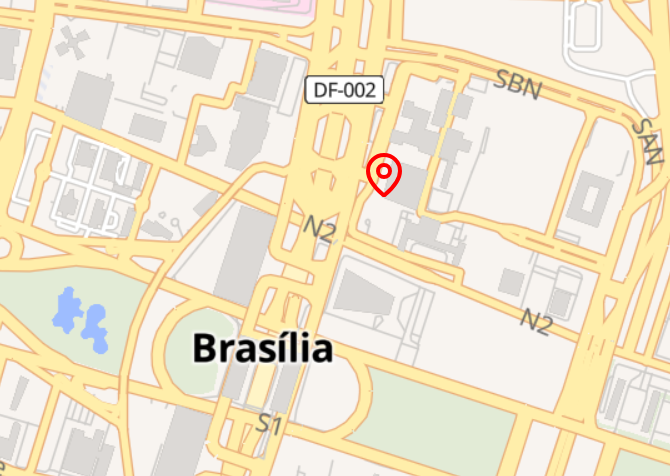
23}Here we import MapPin from lucide-react, and then show it on the map with the Marker component.
If you now look at the application, you will see a map marker.
Showing Popups on Markers
Showing markers might not always be enough. Sometimes you want to show information when clicking on that Marker.
Usually we have more than just one Marker, so lets extract that Marker to be a list instead:
1"use client";
2import * as React from "react";
3import Map, { Marker } from "react-map-gl/maplibre";
4import "maplibre-gl/dist/maplibre-gl.css";
5import { MapPin } from "lucide-react";
6
7interface MarkerData {
8  id: number;
9  longitude: number;
10  latitude: number;
11  title: string;
12  description?: string;
13}
14
15export default function Page() {
16  const markers: MarkerData[] = [
17    {
18      id: 1,
19      longitude: -47.88,
20      latitude: -15.79,
21      title: "Location 1",
22      description: "This is the first marker location",
23    },
24  ];
25
26  return (
27    <Map
28      initialViewState={{
29        longitude: -47.88,
30        latitude: -15.79,
31        zoom: 10,
32      }}
33      style={{ height: "100vh" }}
34      mapStyle="https://tiles.openfreemap.org/styles/liberty"
35    >
36      {markers.map((marker) => (
37        <Marker
38          key={marker.id}
39          longitude={marker.longitude}
40          latitude={marker.latitude}
41          anchor="bottom"
42        >
43          <MapPin color="red" />
44        </Marker>
45      ))}
46    </Map>
47  );
48}
Here we can see we have created a type and a list of markers (with only one entry). Then we loop over the markers with the map function to display them on the map.
Now lets add a Popup.
First we need to import it and create some state to control which marker has a popup.
1"use client";
2import * as React from "react";
3import { useState } from "react"; // Add this import
4import Map, { Marker, Popup } from "react-map-gl/maplibre";
5// Add Popup to the import above this line
6import "maplibre-gl/dist/maplibre-gl.css";
7import { MapPin } from "lucide-react";
8
9
10// ... MarkerData type definition
11
12export default function Page() {
13  const [selectedMarker, setSelectedMarker] = useState<MarkerData | null>(
14    null
15  ); // Add this state
16  // ... Rest of the code
17}
Then, within the map tags we add the following:
1<Map
2 // ... above code
3>
4  // ... above code
5  {selectedMarker && (
6    <Popup
7      longitude={selectedMarker.longitude}
8      latitude={selectedMarker.latitude}
9      anchor="top"
10      onClose={() => setSelectedMarker(null)}
11      closeButton={true}
12      closeOnClick={false}
13    >
14      <div className="p-3">
15        <h3 className="font-bold text-gray-800">{selectedMarker.title}</h3>
16        <p className="text-sm text-gray-600">
17          Coordinates: {selectedMarker.longitude}, {selectedMarker.latitude}
18        </p>
19        {selectedMarker.description && (
20          <p className="text-sm text-gray-600 mt-1">
21            {selectedMarker.description}
22          </p>
23        )}
24      </div>
25    </Popup>
26  )}
27</Map>
What we do here is to check if selectedMarker is not undefined, then we add the Popup element with some HTML to define what to show in the popup.
Finally, we need to set the onClick function on the Marker. This will set the state that tells the program which Marker to display a popup on.
1{markers.map((marker) => (
2  <Marker
3    key={marker.id}
4    longitude={marker.longitude}
5    latitude={marker.latitude}
6    anchor="bottom"
7    onClick={() => setSelectedMarker(marker)} // Add this
8  >
9    <MapPin color="red" />
10  </Marker>
11))}
Here we can see that onClick recieves a function. The function sets the selectedMarker to be the marker you click on.
Our final page.tsx file:
1"use client";
2import * as React from "react";
3import { useState } from "react";
4import Map, { Marker, Popup } from "react-map-gl/maplibre";
5import "maplibre-gl/dist/maplibre-gl.css";
6import { MapPin } from "lucide-react";
7
8interface MarkerData {
9 id: number;
10 longitude: number;
11 latitude: number;
12 title: string;
13 description?: string;
14}
15
16export default function Page() {
17 const [selectedMarker, setSelectedMarker] = useState<MarkerData | null>(null);
18
19 const markers: MarkerData[] = [
20 {
21 id: 1,
22 longitude: -47.88,
23 latitude: -15.79,
24 title: "Location 1",
25 description: "This is the first marker location",
26 },
27 ];
28
29 return (
30 <Map
31 initialViewState={{
32 longitude: -47.88,
33 latitude: -15.79,
34 zoom: 10,
35 }}
36 style={{ height: "100vh" }}
37 mapStyle="https://tiles.openfreemap.org/styles/liberty"
38 >
39 {markers.map((marker) => (
40 <Marker
41 key={marker.id}
42 longitude={marker.longitude}
43 latitude={marker.latitude}
44 anchor="bottom"
45 onClick={() => setSelectedMarker(marker)}
46 >
47 <MapPin color="red" />
48 </Marker>
49 ))}
50
51 {selectedMarker && (
52 <Popup
53 longitude={selectedMarker.longitude}
54 latitude={selectedMarker.latitude}
55 anchor="top"
56 onClose={() => setSelectedMarker(null)}
57 closeButton={true}
58 closeOnClick={false}
59 >
60 <div className="p-3">
61 <h3 className="font-bold text-gray-800">{selectedMarker.title}</h3>
62 <p className="text-sm text-gray-600">
63 Coordinates: {selectedMarker.longitude}, {selectedMarker.latitude}
64 </p>
65 {selectedMarker.description && (
66 <p className="text-sm text-gray-600 mt-1">
67 {selectedMarker.description}
68 </p>
69 )}
70 </div>
71 </Popup>
72 )}
73 </Map>
74 );
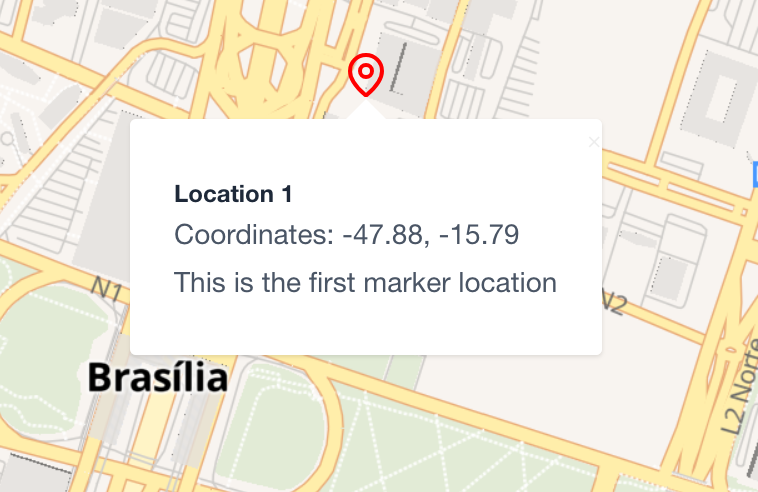
75}
76If you now open your application and click on a marker, you will see a Popup like this:
There are other things you can do with a Marker. For example, you can make it draggable with the draggable parameter. See more here: https://visgl.github.io/react-map-gl/docs/api-reference/maplibre/marker
Sources and Layers
Map sources is a way to give GeoJSON data to the map. GeoJSON is a way to represent geographical data in JSON format.
As an example, we are going to show a polygon in the shape of a triangle on the map.
First we need to add some GeoJSON data. The following data contains a list of coordinates that represent each point of the polygon. It also defines the data as a polygon.
1const data: GeoJSON.GeoJSON = {
2    type: "Feature",
3    geometry: {
4      type: "Polygon",
5      coordinates: [
6        [
7          [-47.893, -15.79],
8          [-47.882, -15.778],
9          [-47.873, -15.79],
10          [-47.893, -15.79],
11        ],
12      ],
13    },
14    properties: {},
15  };
To show this data on the map, we have to add a Source, and a Layer. The Source gives the data to the map, while the Layer shows that data.
1<Map
2  initialViewState={{
3    longitude: -47.88,
4    latitude: -15.79,
5    zoom: 10,
6  }}
7  style={{ height: "100vh" }}
8  mapStyle="https://tiles.openfreemap.org/styles/liberty"
9>
10  <Source type="geojson" data={data}>
11    <Layer
12      type="fill"
13      paint={{
14        "fill-color": "#ff0000",
15        "fill-opacity": 0.6,
16      }}
17    />
18  </Source>
19</Map>
Our final page.tsx then looks like this:
1"use client";
2import * as React from "react";
3import Map, { Source, Layer } from "react-map-gl/maplibre";
4import "maplibre-gl/dist/maplibre-gl.css";
5
6export default function Page() {
7  const data: GeoJSON.GeoJSON = {
8    type: "Feature",
9    geometry: {
10      type: "Polygon",
11      coordinates: [
12        [
13          [-47.893, -15.79],
14          [-47.882, -15.778],
15          [-47.873, -15.79],
16          [-47.893, -15.79],
17        ],
18      ],
19    },
20    properties: {},
21  };
22
23  return (
24    <Map
25      initialViewState={{
26        longitude: -47.88,
27        latitude: -15.79,
28        zoom: 10,
29      }}
30      style={{ height: "100vh" }}
31      mapStyle="https://tiles.openfreemap.org/styles/liberty"
32    >
33      <Source type="geojson" data={data}>
34        <Layer
35          type="fill"
36          paint={{
37            "fill-color": "#ff0000",
38            "fill-opacity": 0.6,
39          }}
40        />
41      </Source>
42    </Map>
43  );
44}
45
If we then look at our webpage, we can see the polygon.

MapProvider and useMap
Over to some more advanced features. Note that you do not need this to get started, but it is nice to have for separating map logic into different files.
When programming map applications, it can quickly become a lot of code. To separate this into different files we can use MapProvider and useMap.
First we need to add the MapProvider:
1"use client";
2import Map, { MapProvider } from "react-map-gl/maplibre";
3import "maplibre-gl/dist/maplibre-gl.css";
4import { SomeComponent } from "./SomeComponent";
5import { SomeOtherComponent } from "./SomeOtherComponent";
6
7export default function Page() {
8  return (
9    <div className="fixed inset-0">
10      <MapProvider>
11        <Map
12          initialViewState={{
13            longitude: -47.88,
14            latitude: -15.79,
15            zoom: 10,
16          }}
17          style={{ height: "100vh" }}
18          mapStyle="https://tiles.openfreemap.org/styles/liberty"
19        >
20          <SomeComponent/>
21        </Map>
22        <SomeOtherComponent />
23      </MapProvider>
24    </div>
25  );
26};
27
We also added some components inside and outside the Map. The important thing is that it is that both components is inside the MapProvider.
As an example, we can create the SomeComponent. You can do the same within SomeOtherComponent if you need it.
In the SomeComponent we can do things with the map by using the useMap hook. Here is an example:
1import * as React from "react";
2import { useMap } from "react-map-gl/maplibre";
3
4export const SomeComponent = () => {
5  const map = useMap();
6
7  const handleClick = () => {
8    if (map.current) {
9      map.current.flyTo({
10        center: [-43.196388, -22.908333],
11      });
12    }
13  };
14  return (
15    <div className="absolute bottom-4 left-1/2 transform -translate-x-1/2">
16      <button
17        onClick={handleClick}
18        className="bg-blue-500 hover:bg-blue-700 text-white font-bold py-2 px-4 rounded shadow-lg"
19      >
20        Go to Rio
21      </button>
22    </div>
23  );
24};
Here we first call useMap to get the map reference. Then we create a handleClick function that calls the maps flyTo function. Finally, we create a button that says "Go to Rio".
Note that you can use the useMap hook inside any component that is a child of MapProvider.